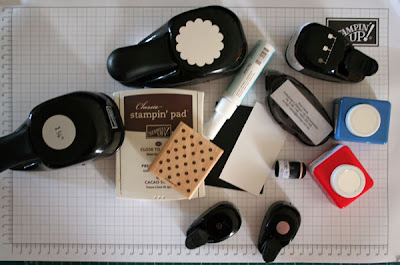
Products used: (All Stampin' Up!)
Scallop punch
1 1/4", 1", 3/4", 1/2" & 1/4" circle punches
Spiral punch
Basic black, whisper white, brilliant blue, real red, close to cocoa and only orange cardstock
Close to cocoa, chocolate chip ink
Boho backgrounds stamp set
Sponge dauber
2 way glue pen
Snail
Stampin' dimensionals

1. Cut basic black cardstock to 2.5" wide x 3.5" high and whisper white cardstock to 4.5cm wide x 3.5" high
2. Using spiral punch, punch holes along both sides of basic black cardstock
3. Adhere whisper white cardstock onto basic black cardstock

4. Punch out 1 each brilliant blue and real red scallop circles

5. Adhere onto ATC as shown in picture

6. Punch out 4, 1/4" basic black circles (eye), 4, 1/2" circles (eyes), 1, 1/2"only orange circle (Elmo's nose), 1/2, 1" basic black circle (Elmo's mouth), 1/2, 1 1/4" basic black circle (Oscar's mouth), 1, 3/4" close to cocoa circle (stamped with boho backgrounds stamp in chocolate chip ink)
 7. Assemble faces as shown
 8. Using scallop circle punch a "nibble" mark out of the cookie to look like a bite mark

9. Ink edges of cookie using close to cocoa ink and sponge dauber. Adhere cookie to mouth using stampin' dimensionals.
 Oscar the Grouch and Big Bird. Made in the same way only using scallop circle, horizontal slot, large oval, small oval, 1/2" circle & 1/4" circle punches along with spiral punch. Certainly Celery, yoyo yellow, regal rose, real red, basic black and whisper white cardstocks.
 Closer look at Big bird's mouth...


4. Punch out 1 each brilliant blue and real red scallop circles

5. Adhere onto ATC as shown in picture

6. Punch out 4, 1/4" basic black circles (eye), 4, 1/2" circles (eyes), 1, 1/2"only orange circle (Elmo's nose), 1/2, 1" basic black circle (Elmo's mouth), 1/2, 1 1/4" basic black circle (Oscar's mouth), 1, 3/4" close to cocoa circle (stamped with boho backgrounds stamp in chocolate chip ink)
 7. Assemble faces as shown
 8. Using scallop circle punch a "nibble" mark out of the cookie to look like a bite mark
9. Ink edges of cookie using close to cocoa ink and sponge dauber. Adhere cookie to mouth using stampin' dimensionals.
 Oscar the Grouch and Big Bird. Made in the same way only using scallop circle, horizontal slot, large oval, small oval, 1/2" circle & 1/4" circle punches along with spiral punch. Certainly Celery, yoyo yellow, regal rose, real red, basic black and whisper white cardstocks.
 Closer look at Big bird's mouth...
A Christmas take on Oscar. I am planning on using him on a card with bah-humbug! LOL
All the same materials as previous only boho blossoms punch, scallop edge punch, real red ink, sponge dauber and dazzling diamonds.

Finally, where it all started from. Drew's 3rd birthday card.
 Materials used: (All Stampin' Up!)
 Materials used: (All Stampin' Up!)
Stamps: sanded background, best friends alphabet lower, boho backgrounds
Inks: Only orange
Cardstock: Basic black, whisper white, regal rose, yoyo yellow, certainly celery, real red, only orange, brilliant blue
Punches: Scallop circle, horizontal slot, large oval, small oval, spiral punch, 1 1/4", 1", 3/4", 1/2" & 1/4" circle punches
And last but not least, Nikki's birthday card seeing as I had never posted it either.


Materials used: (All Stampin' Up! unless otherwise mentioned)
Stamps: Figures of speechInk: Staz on
Cardstock: Watercolour paper, basic black, whisper white, pink passion, tempting turquoise
Other: Scallop punch, 1 1/4" circle punch, watercolour wonder crayons, Making Memories rub ons, misc. ribbon, Sizzix die cuts, Ki Memories pp
Seriously long post from me. By for now.
Ros


7 comments
Cheers
Fi
Liam